

How to Setup Windows Dev Environment
It is very important to have a very good environment set up with all the necessary apps & tools before we start our development. Before I start writing/discussing my learnings on development, I would like to share how I set up my development environment(s).
I have been using both windows and mac for development for the last 15 years. I love both ecosystems. As both of them have their pros and cons.
So first I would like to share how I set up a web development environment on Windows.
Windows development - I am using my HP mini even though it's a 5-year-old Core-2-Duo, my web development is pretty smooth. I have been using node, react, python in this machine and dint face any hiccups till now (10GB RAM and an SSD).
Microsoft has come a long way with WSL. The Windows Subsystem for Linux lets developers run a GNU/Linux environment -- including most command-line tools, utilities, and applications -- directly on Windows, unmodified, without the overhead of a traditional virtual machine or dual boot setup.
WSL was pretty slow when I tried this last time. But with WSL2 full-fledged ubuntu development experience is very smooth right from the terminal. WSL2 uses Hyper-V virtual machine technology so Linux compatibility is very good and file access is pretty fast. We can run Visual Studio Code on windows, our application in ubuntu and both will be using the shared file system. I am not a fan of dual-boot so I was using my MacBook Pro for development. To have windows and ubuntu running in parallel we can enjoy playing games, entertainment, and development all-in-one place. Windows runs pretty well if you have the right hardware.
Requirements
WSL2 is compatible with the Windows Home, Pro, Enterprise, and Server editions. Windows version should be 2004 or above. You can know your version from Settings > System > About or run winver command. You will see something as below.

You can update by clicking the Check for updates button in Settings, then Update & Security.
WSL2 (and Hyper-V) require hardware virtualization support to be enabled in your BIOS. Make sure Virtualization Technology, VTx, or any other similar option is enabled in BIOS.
Let's Get Started
If you are on Windows Insiders Program and have installed a preview build of Windows 10 (OS build 20262 or higher). Use command below -d <Distribution Name> is optional:
wsl --install -d <Distribution Name>This will perform tasks below
- Enables the optional WSL and Virtual Machine Platform components
- Downloads and installs the latest Linux kernel
- Sets WSL 2 as the default
- Downloads and installs a Linux distribution(default:
Ubuntuif not given) (a reboot may be required)
If you are using a regular build of windows then follow as below, else go directly to Running Ubuntu.
Enable WSL and Virtual Machine features
Open PowerShell in administrator by right-clicking and click on "Run as Administrator". Run below two commands one after another:
dism.exe /online /enable-feature /featurename:Microsoft-Windows-Subsystem-Linux /all /norestartdism.exe /online /enable-feature /featurename:VirtualMachinePlatform /all /norestartAfter both of them are installed, restart your machine to complete the WSL install.
Download and Install WSL2 Linux kernel update
Please run systeminfo | find "System Type" to know the kind of machine you are running. Accordingly, download one of the below packages and install it as administrator.
Once the installation is complete, we will be setting WSL 2 as your default version when installing new Linux distributions. (Skip this step if you want your new Linux installs to be set to WSL 1).
wsl --set-default-version 2Install Linux distribution
Open Microsoft Store and search for Ubuntu which will install Ubuntu 20.04 LTS...
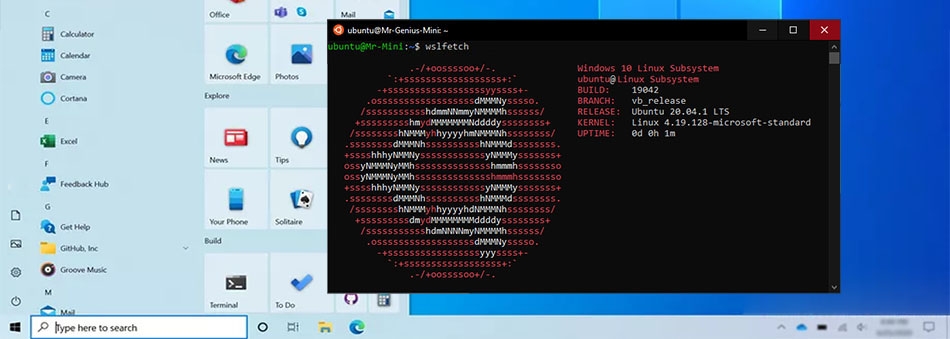
Run "Ubuntu" from Start Menu. The first run will take some time for the initial setup. It will ask you to create a username and password. When you run any command as root you will use the same password that is whenever you do anything as superuser sudo. This account will be your default user for the distribution and automatically sign-in on launch. From next time onward terminal launches in a second. Now you are running Linux on Windows.

Update and upgrade packages
After logging in for the first time we need to update and upgrade our Linux packages. Windows do not automatically update or upgrade Linux distribution(s). For Debian/Ubuntu, use apt:
sudo apt update && sudo apt upgrade -y && sudo apt dist-upgrade && sudo apt autoremoveVisual Studio Code
Before we get into terminal setup, lets Install Visual Studio Code, we have two options
- Visual Studio Code - Regular stable build
- Visual Studio Code Insiders - try latest features with daily releases, can have bugs. I have been using this for quite a long time I didn't find any bugs, even if we find some can report them back and they will be fixed in a day or two depending on the blocker.
Installation by default adds code to PATH. We can access code from cmd by typing
code .Remote - WSL extension has to be mandatory to work with WSL side code, make sure it is installed. We will not be installing any more extensions (we have to install them in WSL mode for our extensions to work properly).
Windows Terminal
Open Microsoft Store and search for Windows Terminal. Windows Terminal enables multiple tabs you can easily switch between Linux Terminals, Windows Command Prompt, PowerShell, Azure CLI, etc.
Install below fonts in windows which we will be using to customize the Windows Terminal and VS Code as well.
- MesloLGS NF Regular.ttf
- MesloLGS NF Bold.ttf
- MesloLGS NF Italic.ttf
- MesloLGS NF Bold Italic.ttf
- Fire Code
Launch Windows Terminal, open settings by pressing key combination ctrl+, once you are there copy paste the below code in the ubuntu section. Check out my settings.json for your reference.
"fontFace": "Cascadia Code PL", // Font Family
"startingDirectory": "//wsl$/Ubuntu/home/ubuntu/",
"colorScheme": "One Half Dark", // color scheme
"closeOnExit" : true, //closes the terminal on exit
You can take a look at other terminal themes and even customize them as per your taste: Windows Terminal color schemes.
The Below code will add a background image to the terminal giving is some opacity, add it to the ubuntu section or defaults section to set background for all sessions.
"useAcrylic": true,
"acrylicOpacity": 0.8,
"backgroundImage" : "C:/Pictures/Terminal/windows.jpg",
"backgroundImageOpacity" : 0.2,
"backgroundImageStretchMode" : "fill"
Result:

Git
Before installing any apps into Ubuntu, lets upgrade GIT to the latest version
sudo add-apt-repository ppa:git-core/ppa && sudo apt update && sudo apt install gitThen git --version should give you the latest version of GIT installed. It's time to set up the git username and email in git-config.
git config --global user.name "Your name"
git config --global user.email "Your email"
Now we generate the SSH key
ssh-keygen -t ed25519 -C "your_email@example.com"Follow the instructions and make sure to give a secure passphrase for better security. Public/Private ed25519 key pair will be generated in the default .ssh directory or the location specified by you. The default location would be /home/ubuntu/.ssh/id_ed25519.pub.
Add the SSH key, but first, we have to ensure the SSH agent is running
eval $(ssh-agent -s)You should get a similar output: Agent pid ##. Next, add your ssh key
ssh-add ~/.ssh/id_ed25519List the added ssh keys
ssh-add -lAdding a new SSH key to your GitHub account. Clip.exe works in the WSL we can use it to copy the public key.
clip.exe < ~/.ssh/id_ed25519.pubWe can now add the copied SSH key to our GitHub account from Github SSH and GPG keys page.
Testing your ssh key.
ssh -T git@github.comYou will be getting something like this. Now we are good to go.

Note: I will be developing only on WSL, that is why I am not installing Git directly on windows.
Shell - Oh My ZSH
A good terminal will make us feel good and improves our productivity. Oh My Zsh is a framework for managing ZSH configuration, comes with many functions, plugins, helpers, and themes that will make our terminal better in every possible way.
We have to install ZSH before we get started with Oh My Zsh
sudo apt install zshInstall Oh My Zsh with curl
sh -c "$(curl -fsSL https://raw.github.com/ohmyzsh/ohmyzsh/master/tools/install.sh)"~/.zshrc is the configuration file for all our changes, plugins, theme, aliases, and functions.
Theme
I use Powerlevel10k, it has so many built-in segments and its configuration is very easy and simple.
git clone --depth=1 https://github.com/romkatv/powerlevel10k.git ${ZSH_CUSTOM:-$HOME/.oh-my-zsh/custom}/themes/powerlevel10kAfter installing the theme, change the ZSH_THEME in ~/.zshrc.

Restart the Terminal after updating ~/.zshrc. You will see the PowerLevel10k configuration wizard, go through the steps, and customize your terminal as per your like.

I went through my customization and got something like this:

You can always reconfigure by using p10k configure or editing the p10k config file ~/.p10k.zsh which is also very easy to understand. Detailed info on custom options is available here.
Plugins
-
zsh-syntax-highlighting: Syntax highlighting for zsh enables highlighting of commands whilst they are typed. If the command is available it will show green, else it will show red.
git clone https://github.com/zsh-users/zsh-syntax-highlighting ${ZSH_CUSTOM:-~/.oh-my-zsh/custom}/plugins/zsh-syntax-highlighting -
zsh-autosuggestions: Suggests commands as you type based on history and completions
git clone https://github.com/zsh-users/zsh-autosuggestions ${ZSH_CUSTOM:-~/.oh-my-zsh/custom}/plugins/zsh-autosuggestionsNow both's-syntax-highlighting,zsh-autosuggestions` to your plugins list.

-
fzf: Simply a FUZZY FINDER in our terminal. This tool is very useful to find files, complete commands, git commits, processes, hostnames ...so on... :).
git clone --depth 1 https://github.com/junegunn/fzf.git ~/.fzf && ~/.fzf/install
You can know more about the usage of FZF here,
Python 2 & 3
Some people still use Python 2 for their development, so I am listing the installation steps of both 2 & 3 versions parallelly.
# Python 2.7
sudo apt update && sudo apt install python2.7
# Python 3
sudo apt update && sudo apt install python3 python3-pip

# if you plan using python 2.7 as default python
sudo ln -s /usr/bin/python2.7 /usr/bin/python
# if you plan using python 3 as default python
sudo ln -s /usr/bin/python3 /usr/bin/python
fnm & Node
fnm is a Node.js version manager, built-in Rust. This is a faster alternative to nvm if you have been using it earlier, if not I would suggest you start with fnm as this is much faster than nvm. It supports .node-version & .nvmrc. fnm requires unzip for its installation, so we have to install it before installing fnm, ignore this step if already installed.
sudo apt install unzipInstall fnm
curl -fsSL https://fnm.vercel.app/install | bashThe install will automatically add fnm to .zshrc. You can test it by the below command
fnm --version# List all install candidates
fnm ls-remote
# Install latest from the list
fnm install v15.5.1
# List all installed node version
fnm ls
# Choose the version you would like to use
fnm use 15.5.1
# show active version
fnm current
# Restart terminal
# check current node and npm versions
node -v && npm -v
# list globally and locally installed npm packages
npm list -g --depth=0 && npm list --depth=0Testing our setup lets install create-react-app
npm install -g create-react-appLet's create a react app and test it
npx create-react-app my-app && cd my-app && npm startOn a successful start, you should see something like this, which means your WSL is working fine and you can start developing web apps.

Note: The ports created by servers and services in ubuntu(wsl) are automatically exposed to Windows, we can work directly in your desktop browser without any customization.
.Net Core
Microsoft uses HTTPS to deliver DEB packages for ubuntu, we must have apt-transport-https
sudo apt update && sudo apt-get install -y apt-transport-httpsWe need the universe repository enabled, to list them using the below shell command
egrep -r '^[ ^I]*[^#].*universe' /etc/apt/sources.list*If dint find any repositories, run below to enable
sudo add-apt-repository universeNow we will be adding Microsoft package repository, run below command
wget https://packages.microsoft.com/config/ubuntu/20.10/packages-microsoft-prod.deb -O packages-microsoft-prod.deb && sudo dpkg -i packages-microsoft-prod.deb && rm -rf packages-microsoft-prod.deb && sudo apt updateNow we have everything we need to install dotnet core. You can run any of the below commands depending on your development requirement.
.Net Core SDK
sudo apt-get install -y dotnet-sdk-5.0.Net Core Runtime
sudo apt-get install -y dotnet-runtime-5.0ASP .Net Core Runtime
sudo apt-get install -y aspnetcore-runtime-5.0You can run dotnet --info to check the information about SDKs and runtimes installed.
To see the list of .net core templates you can use to create solutions using dotnet new. To test you can use the below commands to create and run the "Hello World" console application
dotnet new console -o helloWorld && cd helloWorld && dotnet runYou are all set to start developing .net core applications.
Gatsby
I developed this website using gatsby, this would an optional step if you don't want to use it.
Gatsby requires a few packages to be installed before installing gatsby-cli.
sudo apt install build-essential libvips-dev libpng-devInstall gatsby-cli
npm install -g gatsby-cliWe are done with shell setup, let get our IDE in place...
WSL & Visual Studio Code
Before we go to the next step let's customize vscode.
Let's addFira Code font which we have installed earlier, Fira Code is a free monospaced font with programming ligatures. Add below line to vscode settings
"editor.fontFamily": "Fira Code",We have to set the same font as we have used for Windows Terminal, add the below lines to vscode settings
"terminal.integrated.fontFamily": "MesloLGS NF",
"terminal.integrated.fontSize": 12,
We have reached our final step. Before starting VSCode it better we have our repo downloaded and our current working folder is the repo folder, Type code . When doing this for the first time, vscode will install server components needed to run in WSL. This should only take a short while and is only needed once.
Note: If this command does not work, you may need to restart your terminal or you may not have added vscode to your path when it was installed.

vscode opens with WSL and the terminal will be the same as above.

Let's customize vscode by installing extensions, icons, and themes. Below is the list of extensions, themes, and icon pack I am currently using for node/react development.
Extensions
- Prettier - an opinionated code formatter
- ESLint - Integrates ESLint JavaScript into
vscode - markdownlint - Markdown linting and style checking
- Sort JSON objects - Sorts the keys within
JSONobjects - GitLens - helps visualize code authorship at a glance via
gitblame annotations and code lens - Import Cost - import/require package size in the editor
- View Node Package - Open a Node package repository/documentation straight from
vscode - Debugger for Firefox, Debugger for Chrome - Debug your web application from browser
Theme - Hopscotch - You can find so many very good themes of your choice as well.
Icons - vscode-icons - been using this from very longtime and am pretty used to these icons.
Docker - Optional
If you are used to docker based development you can install docker-engine in both ubuntu and windows.
Prerequisites
Before any install, we have to update the apt package index
sudo apt-get updateWe have to install all the required packages for Docker install
sudo apt-get install apt-transport-https ca-certificates curl gnupg-agent software-properties-commonNow add Docker’s official GPG key:
curl -fsSL https://download.docker.com/linux/ubuntu/gpg | sudo apt-key add -

# Verify that you now have the key with the fingerprint 9DC8 5822 9FC7 DD38 854A  E2D8 8D81 803C 0EBF CD88
sudo apt-key fingerprint 0EBFCD88
We have to add the stable docker repository:
sudo add-apt-repository "deb [arch=amd64] https://download.docker.com/linux/ubuntu $(lsb_release -cs) stable"Note: For arm processors replace'amd64' with arm64
Install Docker Engine
sudo apt-get update
sudo apt-get install docker-ce docker-ce-cli containerd.io
After this docker-engine should be up and running else run the below command to start docker-engine
sudo service docker startLet's test if it is working fine by starting a hello-world container
sudo docker run hello-worldYou have observed every time we run docker we are running as root (sudo), to avoid that we have to create a Unix group called docker and add users to it. When the Docker daemon starts, it creates a Unix socket accessible by members of the docker group.
# Create the docker group
sudo groupadd docker
# Add current user to the docker group
sudo usermod -aG docker $USER
To make sure group changes are activated let's restart wsl, run the below command in powershell replace the wsl name with appropriate one in my case here it is ubuntu
wslconfig /t UbuntuWSL will start automatically next time you open a shell. To test you can run docker commands without sudo run hello-world container
docker run hello-worldNote: If you observe you have to start docker daemon every time wsl restarts use sudo systemctl enable docker to start when the system boots
Install Docker Compose
Run this command to download the current stable release of Docker Compose:
sudo curl -L "https://github.com/docker/compose/releases/download/1.27.4/docker-compose-$(uname -s)-$(uname -m)" -o /usr/local/bin/docker-compose && sudo chmod +x /usr/local/bin/docker-compose*To install a different version of Compose, replace1.27.4 with the version *of your choice
Add docker and docker-compose to the plugins list in ~/.zshrc
plugins=(... docker docker-compose)Check docker-compose version
docker-compose --versionInstall Docker for Windows
Install Docker for Windows. You can see the below options, make sure Install required Windows components for WSL 2 is checked.

Once installed and docker is started, you should see the hello-world container which is started in wsl. Now we can manage wsl containers/images from docker for windows, We are all set for docker based development.

Epilogue
Windows 10 a great OS to use for development as well, the improvements to WSL 2 along with vscode as IDE made it seamless to create an environment that is similar to the Linux and Mac environments. I will continue to use this for web development along with my mac and will continue to keep you all posted with new things and my learnings in the future.
I hope this article helped you to learn a few new things and speed up your setup process.
Comments